

If you've followed this blog at all, you know I'm an avid Pinterest browser. One day I saw a little white playhouse and fell in love. I knew it was my next project. I read blog post after blog post of how people transformed their plastic and wooden kiddo playhouses into adorable places to play.
I finally found the house I was looking for so we decided to get it for the girls for Christmas. My plan was to have it finished by the time it warmed up. We talked about putting it together inside but I thought about the headache of trying to move it, passed.
In early January, I laid everything out and started painting what I thought was the interior pieces. I figured it would be easier to paint them before assembling so I didn't have to crawl inside and paint. Most people recommended spraying this but since we didn't have a paint sprayer, this wasn't an option. So I went with a paint/primer from Sherwin Williams. This is the most important piece of advice if you are thinking about doing this-- GET A GOOD PRIMER AND MAKE SURE IT WORKS.
I've painted this adorable house more times than I should admit because ours did not do a good job. The wood just keep bleeding through when it rains. We've mostly gotten it under control now but I have a feeling, I have more coats of paint in my future. Also, whatever I used (And it is an exterior) is not holding up well in the outdoor elements.
So flash forward to mid-March when our kids daycare closed, the house was still sitting in our shop, with only the "interior" painted. I figured that I should go ahead and put the house together and finish painting it later. These kids needed something to do!!

So the house was painted. Little by little and we played with it every step of the way. Turns out, some of the panels I thought were interior, weren't... we had a nice mix of weird painting. I ended up painting the roof first. I had some leftover black exterior paint from when we had our home shutters painted last year. It worked great and only required one coat.
Painting the inside was by far the hardest. The house has lots of grooves and the inside of this thing is not big. Definitely recommend crawling in and out through the windows! I finally finished all the painting.. and re-painting... and some re-painting and sealing. And it was time to move on to all the upgrades I wanted to do. People have done so much to this house online, I took a lot of ideas from different sources and combined them for the perfect little house!

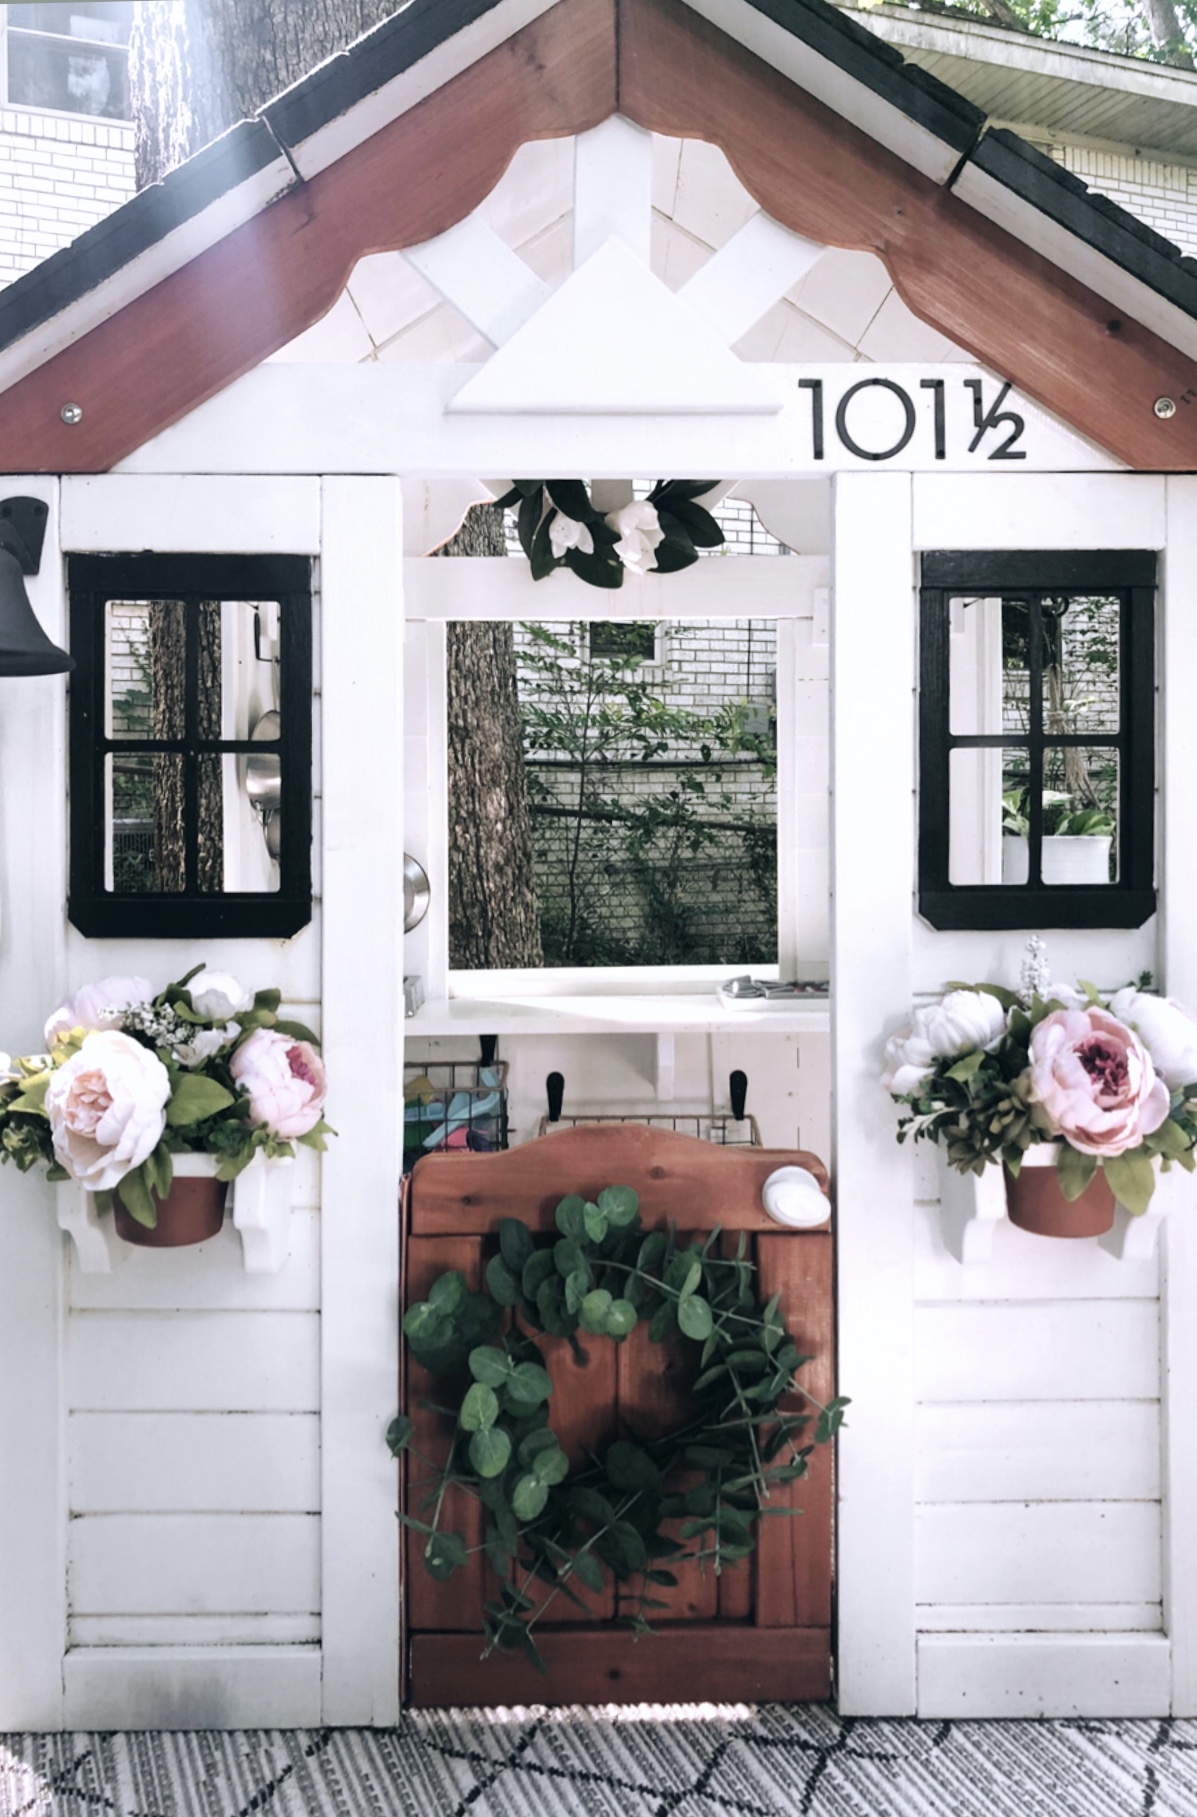
We debated for the longest time on where to put the house. Our backyard is uneven so we settled on the concrete landing pad behind our house. We worried the area would be too small but it's actually worked out well. The girls have a flat place to play and we have room to sit and watch. We added an outdoor rug to cushion to their play a bit.


I did a fair amount of "upgrades" to the house. I felt like it needed a little more counter space. The house came with a counter "space" on the interior for the sink and stove. It didn't extent the length of the back wall, so I took that out and cut a 1x8 board down to fit inside. I also added one out of the back window for more "prep room." The girls need some space while cooking! :)
Additionally, I added another outside of the left-side window for a bar area, take out window, you know.. the opportunities are endless!

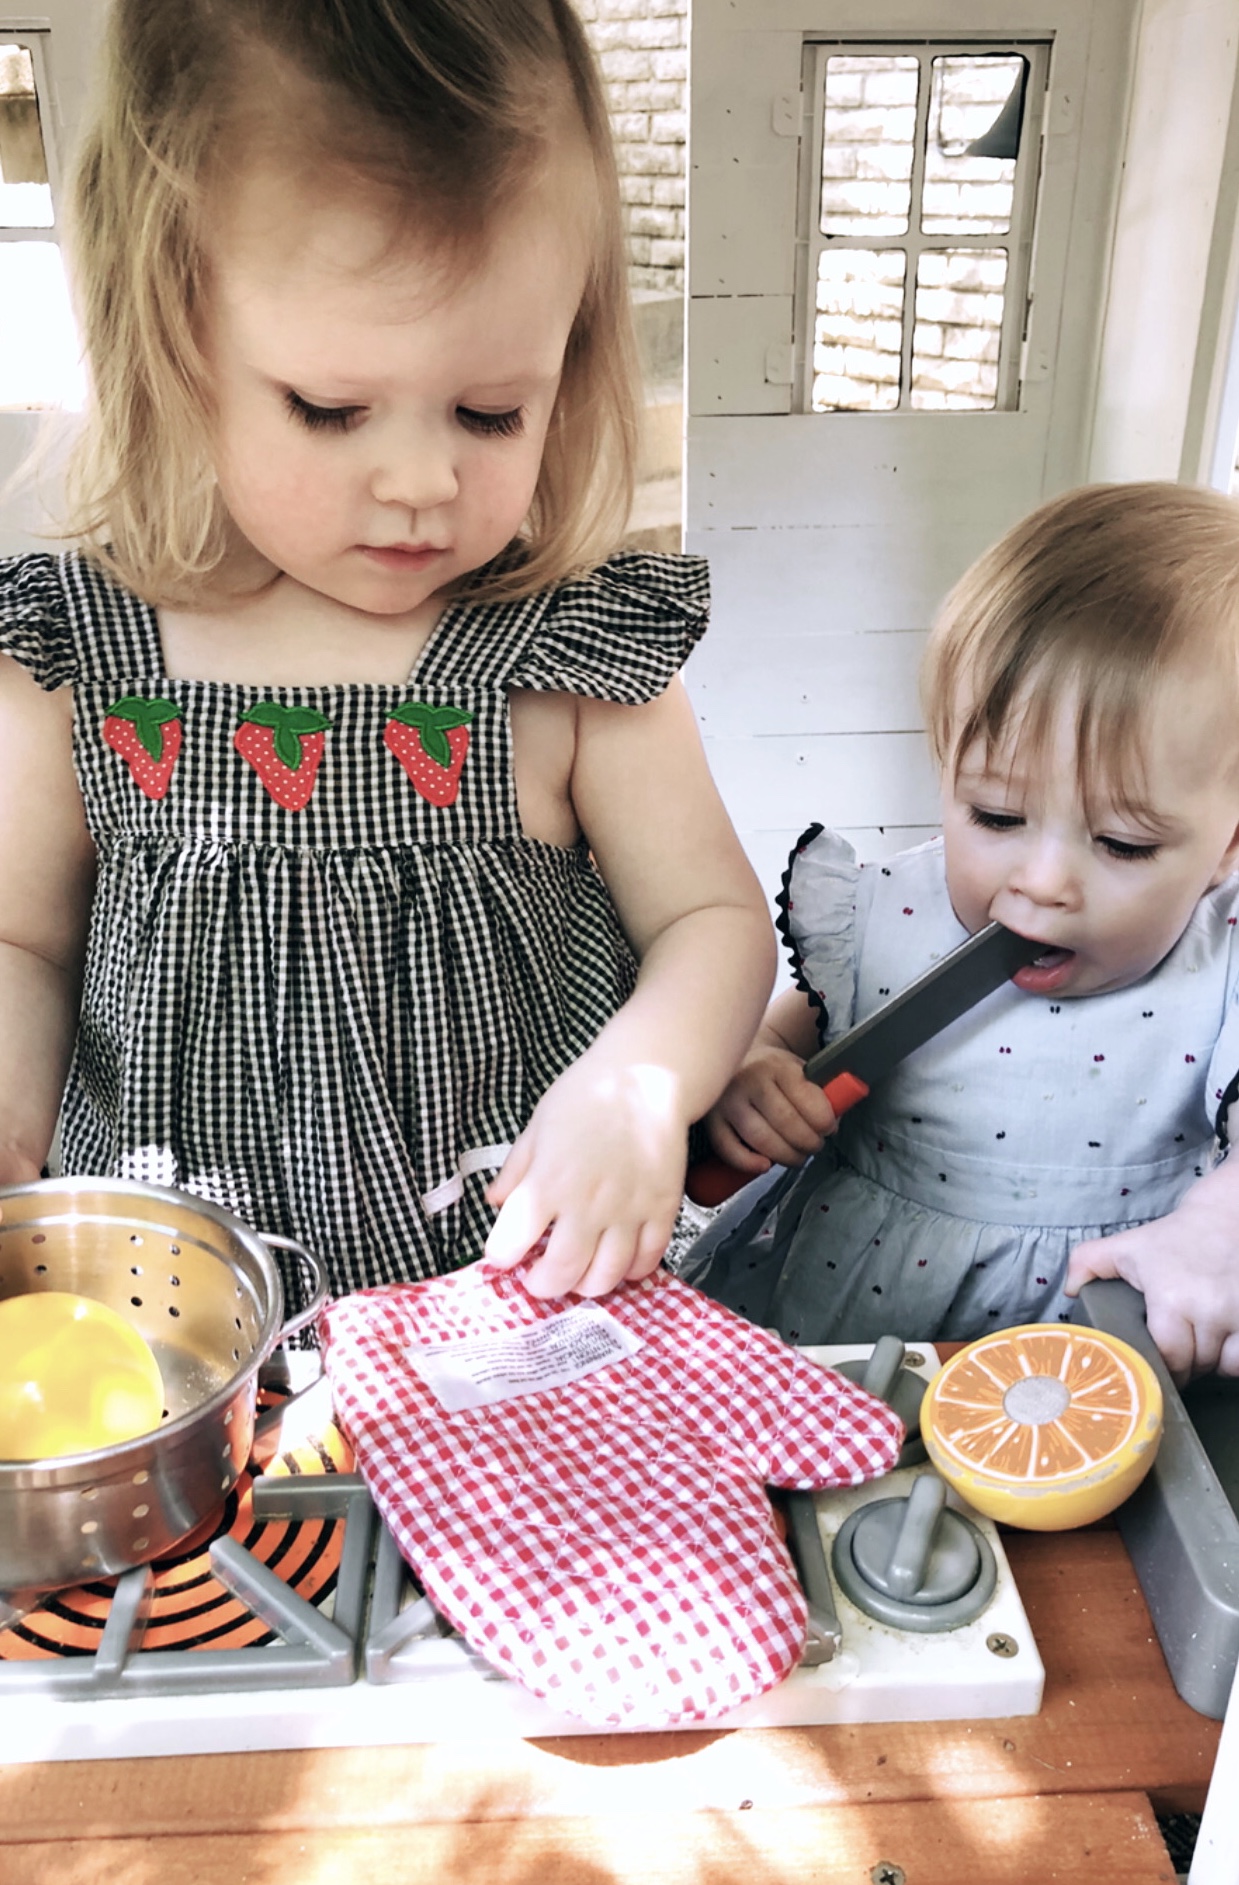
Speaking of prep-room and the kitchen. I added all sorts of extras inside for the girls. Brian laughed when he saw the wreath inside and asked when the plumber and electrician were coming to install services. (insert eye roll emoji here!)

Baskets (OLD- from TJ Maxx, was a three-tier stand of baskets that I took apart)


The sink, phone, and stove all came with the house. I added some fruits and veggies to the baskets, they are Learning Resources. I went with plastic so they could weather the elements.

I added a hanging planter on the right-side. But it doesn't get a lot of love. It hasn't died yet, so I'm calling it a win. I've thought about adding an awning on one of the sides but haven't done it yet. Looking for a good, outdoor fabric before making a call on this one.

One day, while painting my hundredth coat of paint, I thought to myself... the girls better really appreciate all this work that I'm doing. Then I thought, am I doing this for them or because I love these types of projects?! I settled on a little bit of both. I love projects and I love my kids and I LOVE doing anything that will make them smile.
I love watching them play in here and enjoy the house. I know they would still like it if it was exactly out of the box. Watching Emily swing open that front door (or pull off the wreath and try to eat it) and seeing Kate have fun, imaginary conversations on the phone, makes me so happy. I hope they will love this house for years to come.

We spent so many evenings and lunch breaks out here while quarantined at home. Some of my favorite memories from COVID quarantine will be right here on this back porch, surrounded by this cute little house. Brian snapped a picture of us one night-- I'm trying to take a sip of my wine, Emily is crawling up my body, Kate is braiding my "Elsa-baid" and it seriously could not be more perfect of an explanation of life right now! Seriously, so many good memories and I'm sure many more to come.


I think I covered all the sources for the house. If I missed anything, shoot me a message :)

How did you paint the windows black? And did you spray paint the phone and inside pieces that came with the house?
ReplyDeleteI hand brushed the windows with a small paint brush. I did not paint the phone or the stove accessories... just the wooden ones.
DeleteThanks for a very interesting blog. What else may I get that kind of info written in such a perfect approach? I’ve a undertaking that I am simply now operating on, and I have been at the look out for such info. galway handyman
ReplyDelete